

What Are Senior Pictures?
Senior pictures are professional portraits taken during a student’s final year of high school. These sessions are designed to capture personality, style, and a major milestone before graduation. Families use senior pictures for yearbooks, graduation announcements, and keepsakes that last long after senior year.
If you’re starting to plan senior pictures, it’s completely normal to feel unsure where to begin. There are a lot of decisions to make, from choosing a photographer to figuring out timing, locations, and outfits.
This guide is here to simplify all of that.
You’ll find a clear, step-by-step breakdown of the entire process so you can make confident decisions without second-guessing anything. Whether you’re trying to figure out when to book, what to expect, or how to plan a session that actually reflects your senior’s personality, you’re in the right place.
How Senior Pictures Work (Quick Overview)
If you want a simple way to understand the process before getting into the details, here’s how senior pictures typically come together:
- Reach out to a photographer and start planning early
- Book your session and secure your date
- Complete a pre-session questionnaire
- Plan locations, outfits, and overall style
- Prepare for your session in advance
- SENIOR PICTURES SESSION DAY!!
- Receive a sneak peek blog post
- Review your full photo gallery
- Select and order your final images
If you’re still figuring out where to start, focus on timing and choosing the right photographer first. The rest of the process becomes much easier once those pieces are in place.
Quick Answers About Senior Pictures
Here are the most frequently asked questions we receive for senior pictures. Our full Senior Pictures FAQ is filled with additional questions and answers.
When should you book senior pictures?
Most families book senior pictures 3 to 6 months in advance. Summer and fall are the most popular seasons, so booking early gives you the best choice of dates and locations.
How long do senior picture sessions take?
Most senior picture sessions last between 2 and 3 hours. Longer sessions allow for multiple outfits and locations, while shorter sessions focus on one look and setting.
What should seniors wear for pictures?
Start with outfits that feel natural and comfortable, then add one or two elevated looks. Variety helps create a well-rounded gallery without feeling overdone.
How much do senior pictures cost in Michigan?
Senior picture pricing varies depending on the photographer and what’s included. A la carte sessions start at only $125 for the session itself with images and products purchased separately.
The Complete Senior Pictures Timeline
Most senior picture sessions follow a clear, step-by-step process from the first conversation to the final images.
Below is a simple breakdown of how everything typically unfolds, along with practical tips at each stage to help you plan with confidence and avoid second-guessing along the way.
Step 1: Reach Out and Start Planning Early
Most parents begin searching for senior pictures several months before they want the session. That timing gives you flexibility, especially if you’re considering popular locations like downtown Detroit or Ann Arbor.
Booking early means:
- better date availability
- more time to plan outfits and locations
- less stress as the school year gets busy
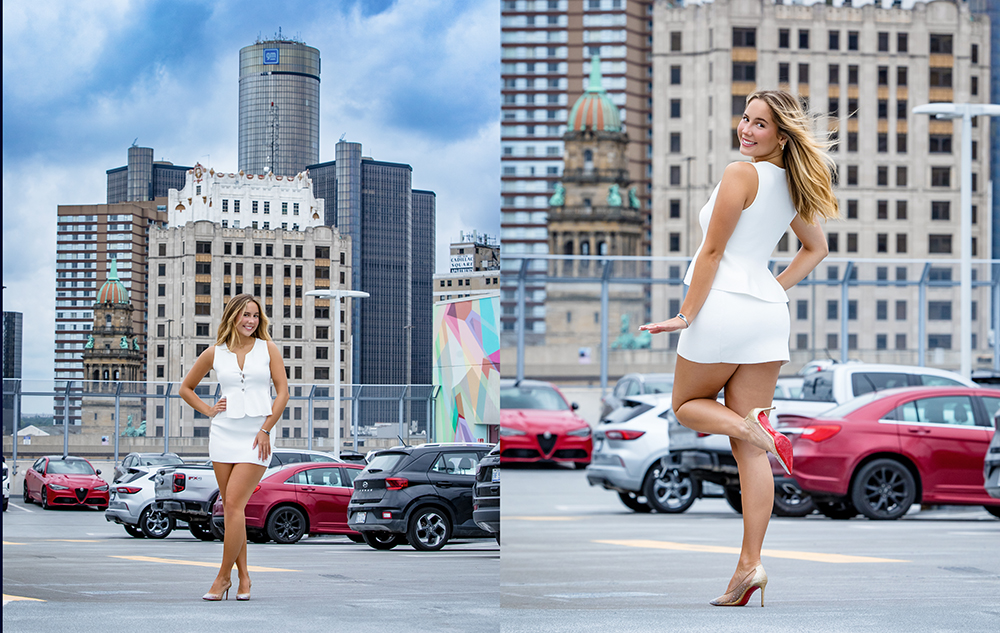
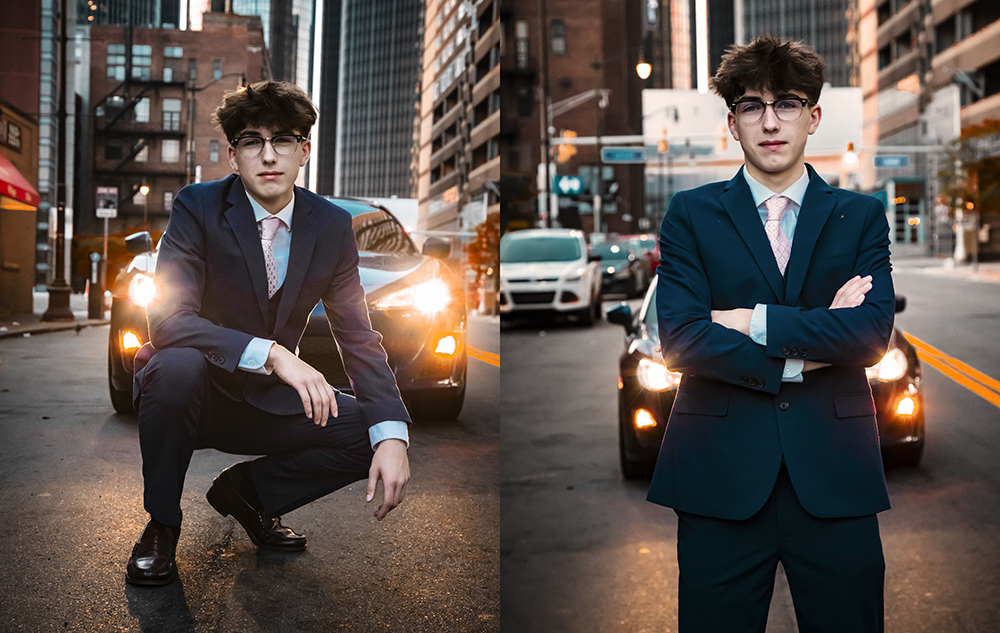
If you’re exploring location ideas, you can start by browsing examples of Detroit senior pictures or Ann Arbor senior pictures sessions to get a feel for different styles.
Step 2: Book Your Senior Pictures Session
Once you find a photographer whose style fits what you’re looking for, the next step is locking in your date. When you’re ready, you can reserve your preferred date through the Client Portal. I recommend booking 3 to 4 months in advance, especially if you want a summer or fall session. A la carte sessions start at just $125, and there are longer portrait packages available that include more time and an account credit to purchase everything you want from your session.
Booking your session early ensures you’re not limited to leftover dates during peak season.
By the way, I offer sessions all year. If you love the idea of snow senior pictures, there’s even a winter waitlist!
Step 3: Fill Out the Planning Questionnaire
This is where your session becomes personal.
A detailed questionnaire helps guide decisions around:
- location choices
- outfit ideas
- overall style and vibe
- comfort level in front of the camera
The more information you provide, the easier it is to create a session that reflects your senior’s personality.
Step 4: Plan Your Senior Pictures Session
This is where everything starts to come together.
You’ll make decisions about:
- where the session will take place
- what your senior will wear
- how much variety you want in your final images
Some families already have a vision. Others need help narrowing down ideas. Both approaches work.
If you’re still deciding on locations, check out options like urban sessions, nature settings, or college campus environments. Many families love the variety offered by Detroit senior pictures or the college-campus feel of senior pictures in Ann Arbor near the University of Michigan.


Step 5: Prepare for the Session
Preparation makes a bigger difference than most people expect.
A few simple steps can help everything go smoothly:
- try on outfits ahead of time
- coordinate colors without matching exactly
- bring backup options
- plan for weather if your session is outdoors
When your senior feels comfortable and confident, it shows in every image.
As session day gets closer, I’ll send reminders and helpful guides to make sure everything is stress-free. Two great resources are:
If the weather isn’t cooperating, we’ll reschedule. Wind is actually more likely than rain to push a session to a new day, especially when long hair or outdoor locations are involved.

Step 6: Senior Pictures Session Day (The Fun Part!)
This is where all the planning pays off.
A well-planned session should feel relaxed and natural. Your photographer should guide your senior through everything without forcing awkward poses or expressions.
Most parents are surprised by how quickly their senior settles in, even if they were unsure about doing photos at first.
If you’re choosing a city session, locations like Detroit offer a wide range of backdrops, from architecture to graffiti to waterfront views.


Step 7: Sneak Peek
You’ll typically receive a link to a sneak peek blog post in your online proof gallery about 1 to 2 weeks after your session.
This gives you something to share with friends and family while the full gallery is being finalized.
Step 8: Review Your Senior Pictures Gallery
Your full gallery will be delivered online through your proof gallery.
This is where you’ll:
- View all your images
- Select favorites
- Decide what you want to purchase
Take your time during this step. Many families find it helpful to narrow down their top choices first, mark them as favorites, and then make final decisions.
Step 9: Order Your Images and Products
Once you’ve selected your images, you’ll place your order.
Popular options often include:
- Digital images
- Prints and canvas
- Framed wall art
The goal isn’t to choose everything. It’s to choose the images that matter most and will still feel meaningful years from now.
If you want any photos touched up, you can add retouching options à la carte. Popular requests include blemish removal, teeth whitening, reducing glare from glasses, smoothing skin, or removing braces.
How to Choose the Right Senior Photographer
Choosing a senior photographer isn’t just about price. It’s about the overall experience.
Here are a few things to consider:
- Does their style match what you want?
- Do their sessions feel customized or standardized?
- Do they guide you through planning, or leave everything up to you?
Some photographers focus on quick, high-volume sessions while others offer a more personalized experience with more time and flexibility. If you’re comparing options, look at full galleries, not just highlight images. That gives you a better idea of consistency.
If you want a deeper breakdown of what to look for and the questions to ask, you can read my full guide on how to choose a senior photographer.
How Much Do Senior Pictures Cost?
One of the most common questions parents ask is how much do senior pictures cost.
The answer depends on how the photographer structures their pricing.
Most fall into one of these categories:
- Session fee plus images purchased separately
- Packages that include a purchase credit or set number of images
- All-inclusive sessions with everything included
Instead of focusing only on price, think about value.
Are you getting:
- help with planning
- flexibility with locations and outfits
- guidance during the session
- images you’ll actually want to keep
That’s what makes the investment worthwhile.
What Parents Wish They Knew Before Booking Senior Pictures
After working with hundreds of families, a few things come up again and again:
- Your senior doesn’t need to love photos for the session to turn out great
- Planning matters more than posing
- The right location can completely change the feel of your images
- A relaxed experience leads to better results than a rushed one
Once you understand these, the process becomes much easier.
Common Senior Pictures Mistakes to Avoid
A few simple mistakes can make senior pictures feel more stressful than they need to be. The good news is they’re easy to avoid with a little planning.
- Waiting too long to book
Popular dates, especially in summer and fall, fill quickly. Booking early gives you better options and less stress. - Rushing the session
Treating senior pictures like a quick errand limits variety and adds pressure. More time leads to better results. - Planning outfits last minute
Outfits affect everything. Trying things on ahead of time helps avoid surprises and gives you better variety. - Choosing locations without a plan
Not all locations photograph well at all times. Lighting and variety matter just as much as the setting itself. - Overcomplicating everything
Too many outfits or locations can actually make the session feel chaotic. A few well-planned choices usually work best. - Focusing only on price
The experience, guidance, and final images matter more than just the upfront cost.
The Bottom Line
Most issues come from rushing or overthinking. With a little planning, senior pictures can feel easy, relaxed, and genuinely fun.
Senior Pictures Planning Checklist
Here’s a simple checklist to keep everything on track:
- Book your photographer early
- Choose your session season
- Plan outfits in advance
- Select locations
- Prepare for session day
- Review and order your images
These small steps make a big difference in how the session turns out.
Senior Pictures Ideas and Inspiration
If you’re still exploring ideas, here are a few popular directions:
- Urban senior pictures in Detroit
- Nature sessions with open fields or wooded areas
- College campus sessions like University of Michigan
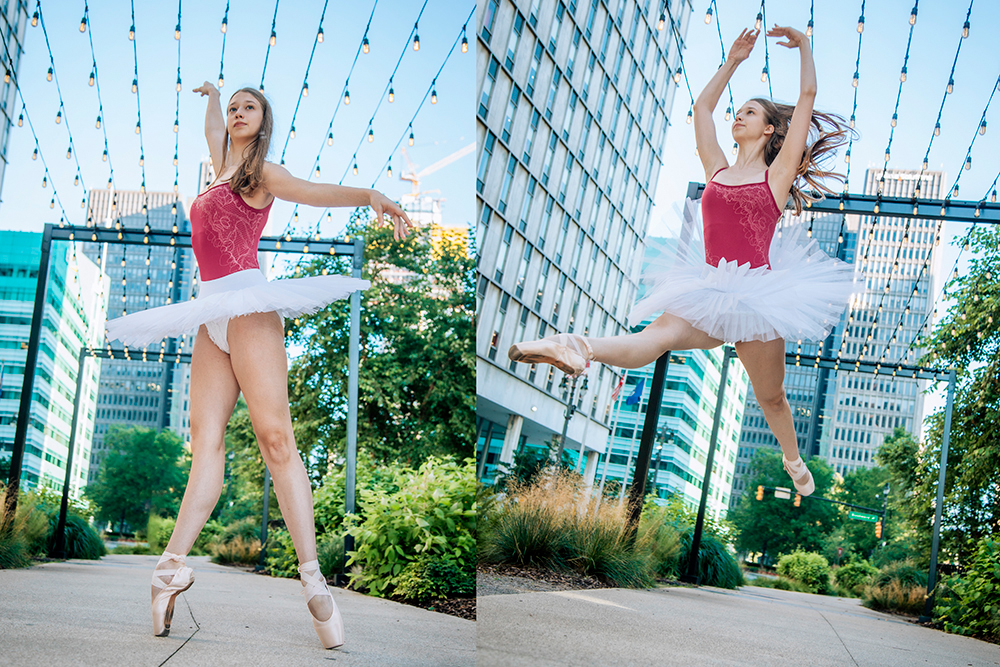
- Hobby-based sessions that reflect your senior’s interests
You can explore more examples on the Detroit senior pictures page, Ann Arbor senior pictures page, or browse the full senior portraits portfolio for inspiration.
Ready to Start Planning Senior Pictures?
If you want a senior pictures experience that feels personal, relaxed, and customized to your senior, the next step is simple. Start the conversation.
You don’t need to have everything figured out yet. Most families don’t at this stage, and that’s completely fine. That’s part of the process.
If you have questions or want to check availability, you can contact me online or call or text 313-883-9500. I’ll help you figure out what makes the most sense for your senior and guide you through the rest from there.
If you’re still in the early planning stage, feel free to keep exploring the guide and come back when you’re ready.

We Set the Bar High and You Delivered!
We simply cannot choose a favorite because it’s all a work of art. I couldn’t have imagined how happy we are with everything. Thank you, Paul. We set the bar high and you delivered!

We can't wait to work with you!
Senior Pictures Information for Parents
- FREE DOWNLOAD
Senior Pictures with Style Guide - Senior Pictures Planning Guide
Complete Guide to Senior Pictures for Parents - Senior Pictures Pricing Guide
Complete Guide to Senior Pictures Prices in 2026

